Just give a product a facelift they said. Add a little something new. Update it! It’ll be easy! Well, one product deleted and completely recreated later…..it was fun and so much more than just a little facelift! =)
I’m so glad I jumped into the TPT Seller Challenge that started this week! At first, I wasn’t sure which product I wanted to tackle first….BUT then, I went to a two day training. In the midst of the training, my creative wheels started turning and I knew EXACTLY what I needed to change…..and quickly! The training was over writer’s workshop with a word wall component. Not just any old run of the mill word wall though…..a new {to our area} word wall system!
Like most of you, my word wall was set up like this at the beginning of the year….in two neat rows, divided between M and N. Well, once upon a time ago….in a PreK training we were advised to hang our word walls horizontally in ONE long alphabetical row from A to Z. Some of us did, space allowing….BUT most of us continued to utilize our word wall in the formation above. It’s worked…it’s been updated to be manipulative. It’s become interactive. NOW….it’s being revolutionized! Which leads me to the product that I made over! Stay with me….I promise we’re going somewhere with this.
Next year, when I go in to set up my word wall…that writing goals chart will have to find a new home because letters WILL be arranged horizontally from A-Z. In addition to adopting the new structure, the background will be black. High frequency words will be posted above the alphabet strip and vocabulary words will be added below the alphabet strip. Different right? There’s more…
With there being two types of high frequency words, differentiation will [visually] come into play. Decodable sight words will be printed on neon paper and cut to the shape of the word. Phonetically irregular words will be printed on white paper and framed in black to the shape of the word. Vocabulary words will be added onto rectangular cut manila paper…below the letter. My classroom “theme” is black and white with pops of color soooo, hearing this started my heart to leaping and gave an educational reason to the color students will be seeing on the word wall.
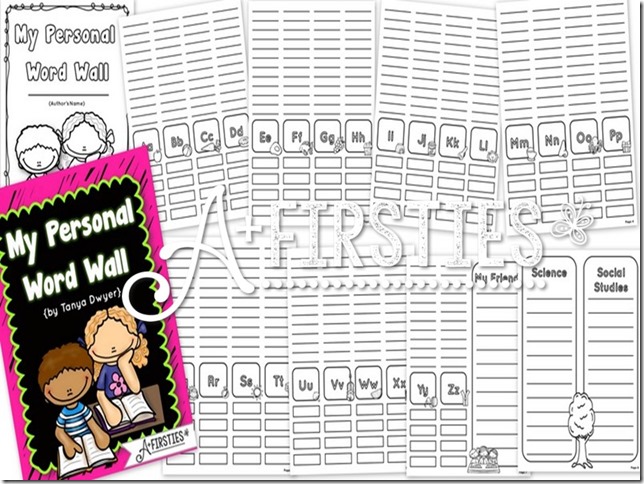
…and it inspired my makeover item! A couple years ago, I created the little book above as a resource for our writer’s workshop folders. The old one is on the left. The NEW and IMPROVED one is on the right!
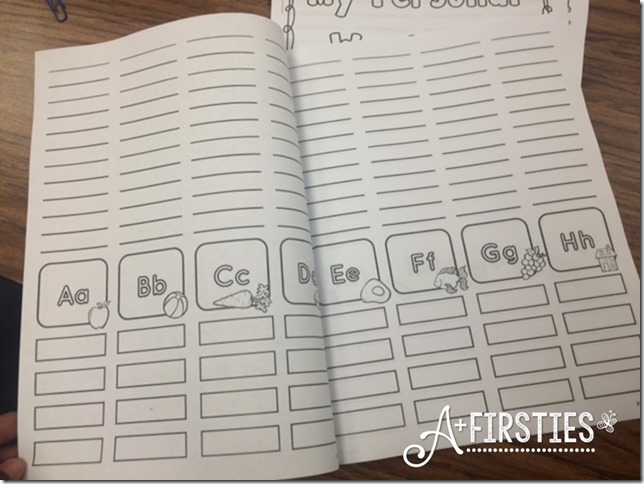
Instead of it being sized to fit into one of the side pockets of the folder, its now been edited for hole punching to fit onto the prongs running down the middle of the folder…to use as a resource to record and find spellings of frequently used words.
Notice the difference on the inside?!!! HUGE! THIS will also be how our word wall will look…..so, the book students will use to record new words will be a reflection of the wall we post them on! Lines will help with organization and they will have the alphabet with accompanying symbols to assist as a formation reference. Mind blown! If you can’t tell….I’m a little excited about the upcoming change! We’ve only been out of school for a week and my head is spinning with ideas to begin preparing for the new year!
Sometimes, friends' names can be a little hard to spell. There’s a space for those names and subject specific words at the end of the book.
Makeover…..done!
I just uploaded this cutie to my TPT store and because I’m so excited about how it turned out, I listed it as a forever FREEbie! Click HERE to grab it! Stay tuned…inspiration is flowing. More is in the works to accompany this….
See ya next week, when we continue the challenge by daring to dream……..BIG!
Wednesday, June 17, 2015
Saturday, June 13, 2015
Desks or Tables?
Hey, Friends! How are ya? The hustle and bustle of ending the year have come and gone. Now, that I’ve had a quick second to catch my breath, I thought I’d stop by to answer a question I seem to keep getting asked over and over …….and over again! =) You know, as teachers, we celebrate ending one year while simultaneously preparing to begin the next one. One of the things I love to do is reflect on my room arrangement and how it affected our learning over the course of the year….then plan for how I’d like to change it to begin the following year.
Oh…the question I keep getting asked? Which do I prefer…desks or tables?
If I were asked this question a few years ago, I would definitely have answered desks…BUT a lot has changed from a few years ago. Beliefs have made a shift. Kids are definitely different. My space is different. My teaching style has evolved. Kiddo learning styles have been better incorporated. I’ve embraced change.
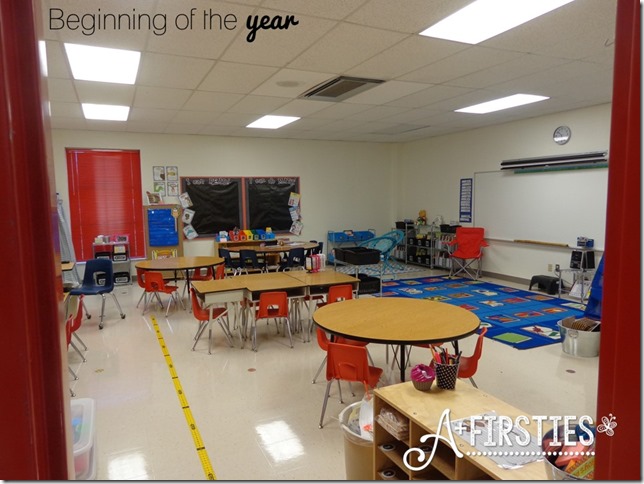
Here’s what my classroom looked like way back in August…
Was making the switch easy? Not initially.
I had read an article online about a teacher’s success without desks and wanted to give it a try. I whole heartedly believe that student choice-driven classroom environments inspire engagement and learning. Having a variation of seating so that students could work where they were most comfortable was high on my priority list for set-up last year.
Even so, I was nervous about letting go of the desks completely. That’s why you see a small group of them. Keep in mind, this picture was snapped as I was preparing for kids. Wanna guess what happened when the kids showed up? The room got completely switched around! It’s a funny thing how we try to anticipate the flow, their needs, what they’ll like and often times we’re very successful….BUT no one can tell you what they’ll like better than the little people who’ll actually be using the space!
By the end of the year, our furniture arrangement looked a little more like this! See? No desks! How’d it go? Did I like it? Were my kids able to control themselves? Awesome! We LOVED it! Absolutely!
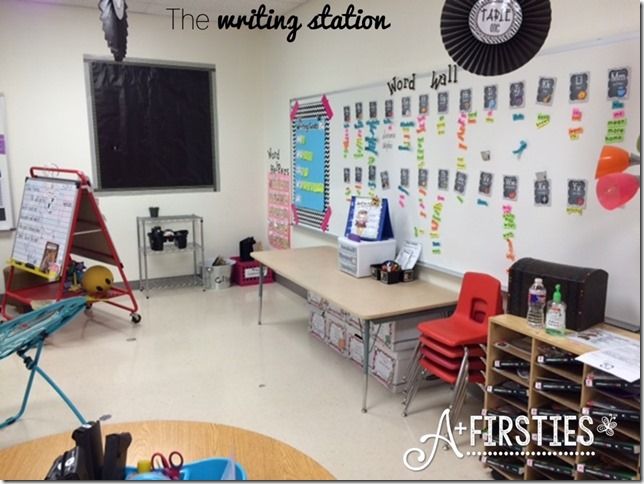
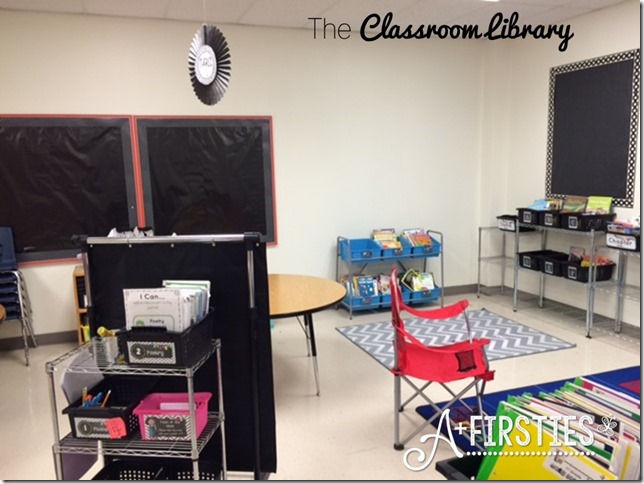
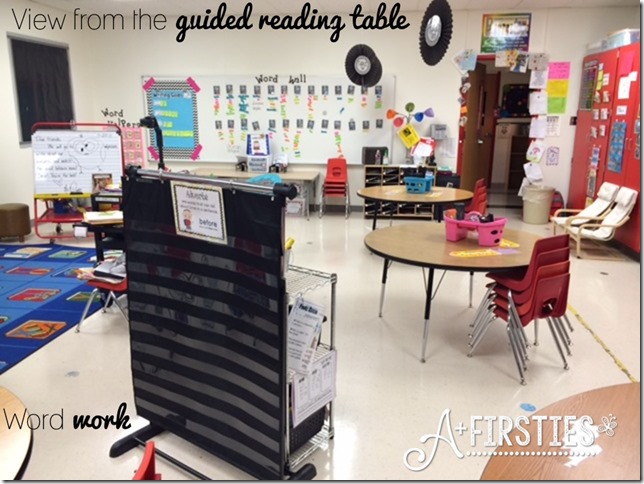
Looking at this picture, the classroom looks pretty big. I promise you, it is NOT. Our classrooms are pretty cozy {real estate synonym for small}. Without the desks, our classroom looked and felt bigger. We had much more room for movement activities, to work on the floor and for bringing in different types of seating. ANNNND guess what? Our classroom was cleaner! There was no place for long lost papers from Christmas past to go and hide. Everything in our classroom had a place. If we didn’t need it, it was out of there! We used our space wisely and were forced to be efficient.
Every student had a space at the table available to them. Including the guided reading table, 3 round tables and 1 rectangle table…there were exactly 22 seats, when needed. You’ll also notice that I did not have a teacher desk. Hate them! They just become a spot to throw stuff on and when exactly would I have time to sit at it anyway?
One of our alternative seating choices was the blue trampoline chairs. EVERYONE on my campus stopped in just to bounce their bottoms out of these at some time or another. They were great for kids that needed to work and wiggle.
Not every kid feels comfortable sitting in a hard plastic chair. The carpet was another area made available for students to work. Wanna lay on your tummy and work…wanna sit crisscross applesauce….need space to spread out? Then the carpet is a good spot! There was also a carpet “capacity limit”. 1 kid could sit in each corner and one in the middle…that way, the WHOLE class couldn’t try sitting at the carpet to work.
See my little computer stand? Not a whole teacher desk and I loved it because it provided the perfect amount of open storage with no room for me to pile anything on it. I shared this space with the kids too which allowed for an additional computer space, when needed. We kinda shared everything!
The red chair was used for sharing at the carpet and doubled as another seating option for independent work time. There was also an upholstered ottoman on top of the chevron carpet. It served as seating and storage in our classroom library.
No mess. No mystery papers floating around. No place to hide things. A clear view throughout the room. Lots of floor space for work, fun and games. Lots and lots of opportunity for collaboration because the arrangement is not focused on the teacher but on kids. When we all needed to meet, it was generally done at the carpet to mimic the closeness of “lap reading”. Our classroom felt more like a comfy lounge, a collaborative setting...where kids were in control of their learning.
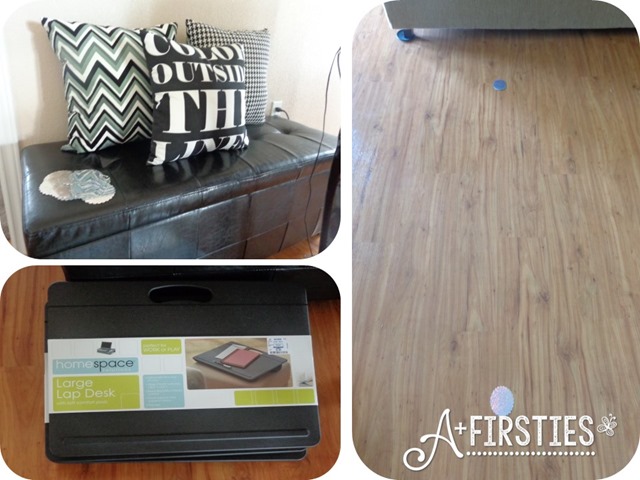
A few things that helped to make working with tables instead of desks successful was the use of clipboards and lap desks. If students chose to sit in a comfy chair, they knew where these were stored in the classroom and were free to grab one. This picture to the top left is the ottoman that was in our classroom library. We used it to store reading books and dictionaries. See the little silver spots on the floor? Smallest chair ever, right? Ha! Those little circles were placed on the floor around the room to designate spots for seating.
So….long story, short...We LOVED having tables over desks. Using tables along with different choices for comfortable seating allowed for my students to choose the setting that best suited their learning style. We rolled with choice.... a LOT. I gave my students the opportunity to make choices with the understanding that the choice also comes with responsibility. They were free to choose as long as they showed me they were capable of handling the choice….ONLY.
I loved using tables so much….I’m taking them with me to SECOND GRADE next year! That’s right peeps…A+ Firsties just got promoted!
I’d love to hear your thoughts on using tables or desks…chime in with a comment below!
Subscribe to:
Posts (Atom)
